


 GEAR CASE

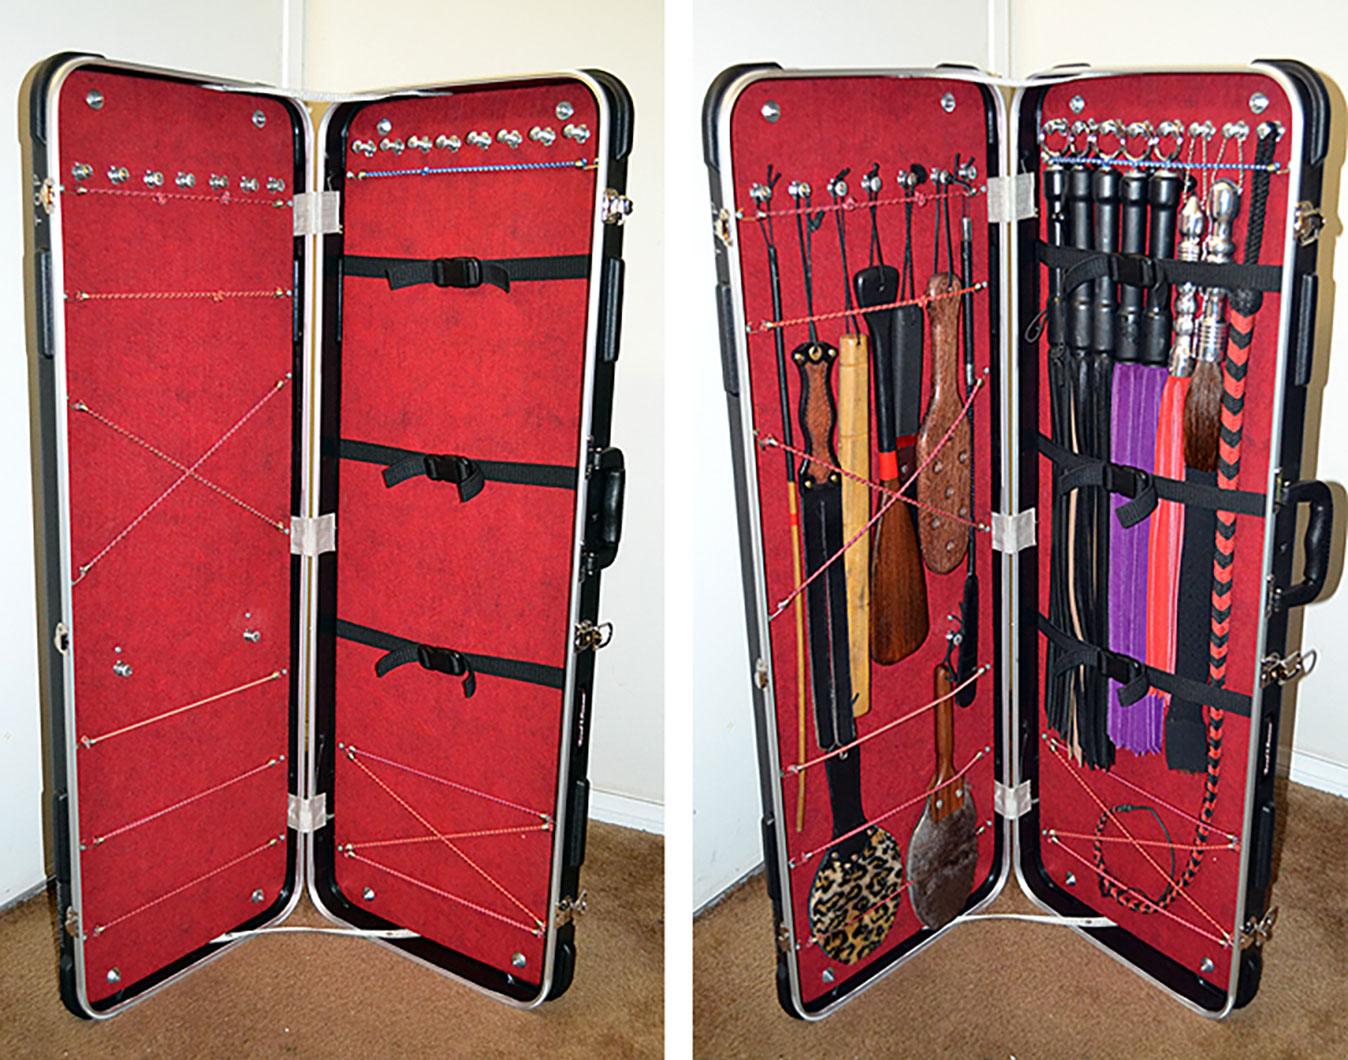
Many people have asked me about my BDSM tool case (toy case), so I thought I'd show how I made mine, should anyone be interested making one for themselves.
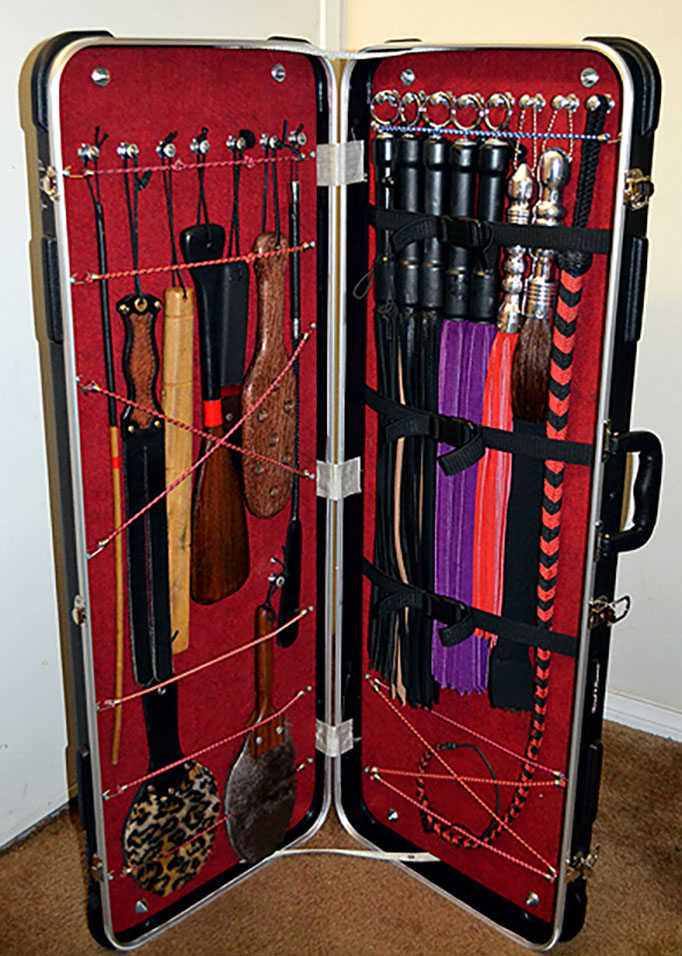
I can't stand for my floggers to be thrown into a bag. Before this case that I made, when I would arrive at an event or dungeon to scene, my floggers would end up looking like wrinkled, tangled pom-poms. It was difficult for me to control the falls of my floggers when they were in this condition. This is a problem I didn't have at home, as my floggers hung on hooks mounted to my bedroom walls. I was the first to create this sort of gear case, in which straps keep the falls of the floggers extended and straight during travel, and the lid acts as an easel to stand the case upright. This case is a way of bringing the wall of floggers to the event, keeping the falls straight. This works best when your handles have rings or hangers.
I should warn to anyone thinking of making one of these, that the case is heavy and even heavier if you load it full of tools (toys). For me, the benefits are worth the weight. Plus I use a small handtruck dolly with mine.
INSTRUCTIONS:
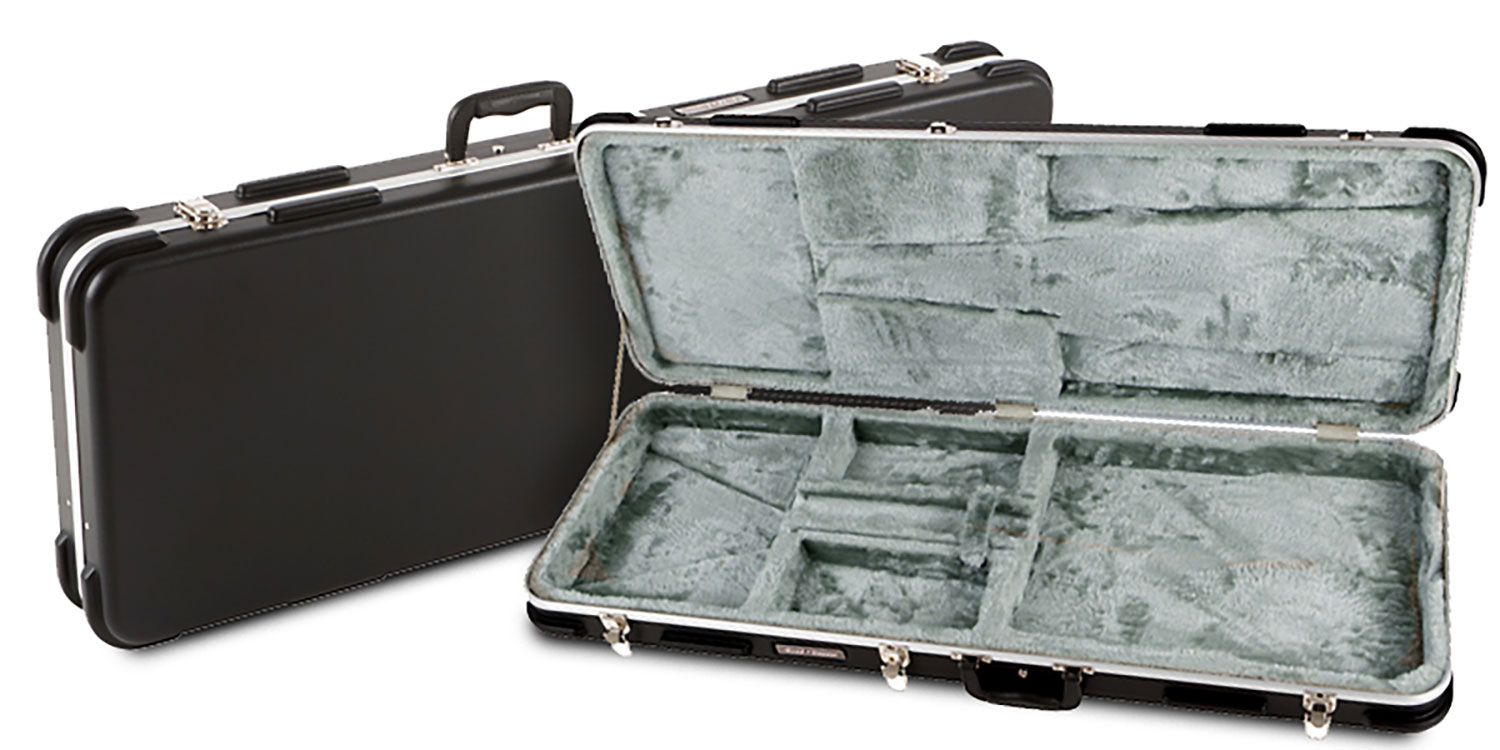
Buy a sturdy bass guitar case. There are many on the market and many different cases could work well. I found that a
Road Runner
base case works the best and is reasonably affordable. Be sure that you are happy with the case you choose, as you can't return it once you start tearing it apart.
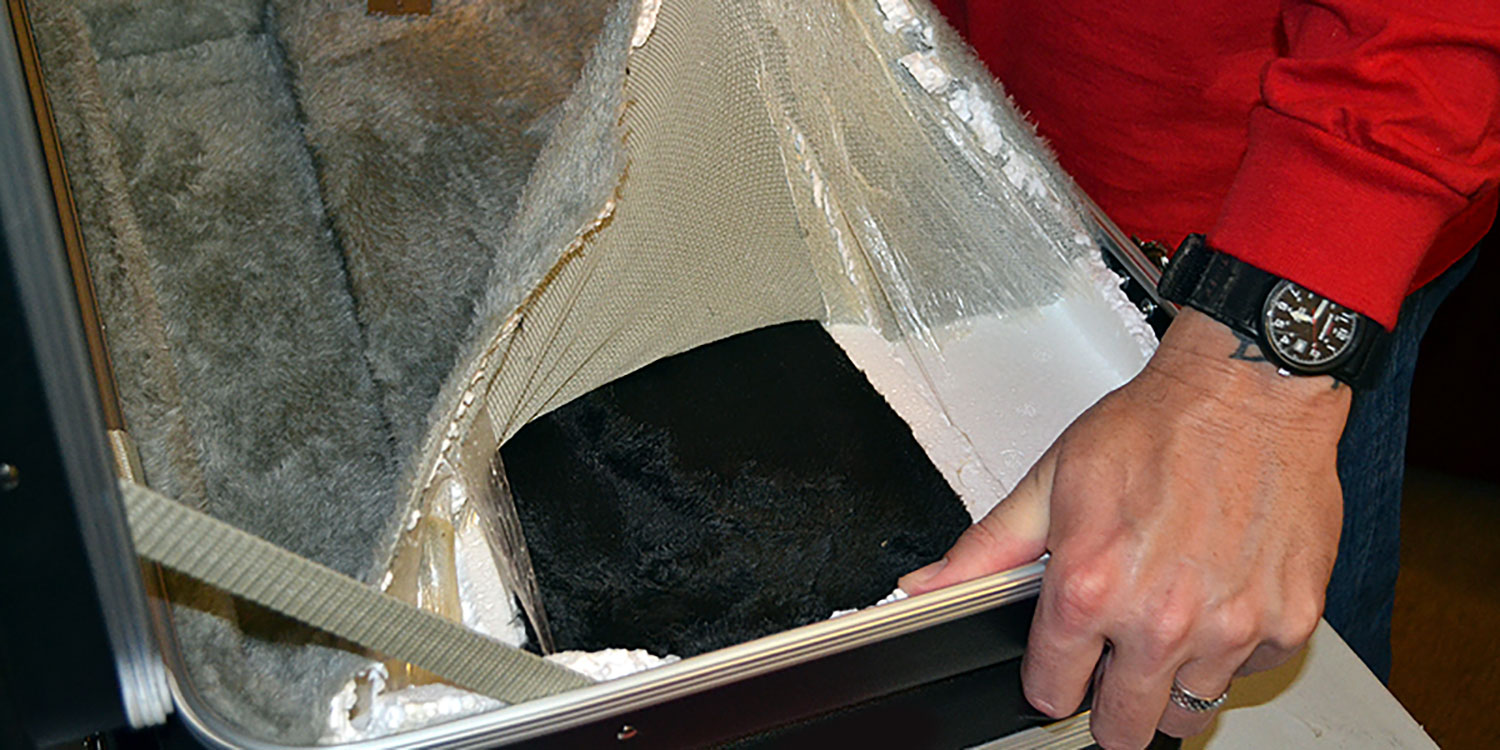
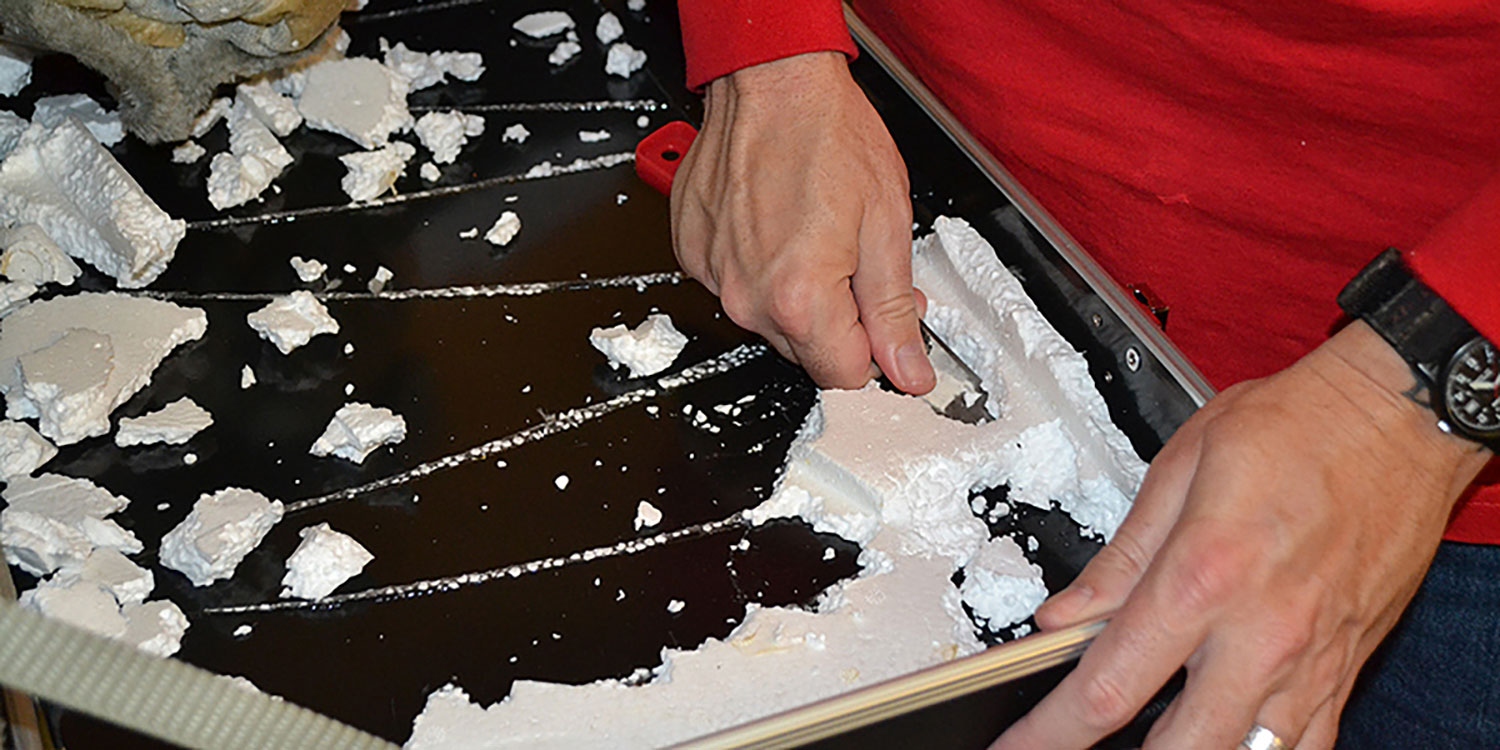
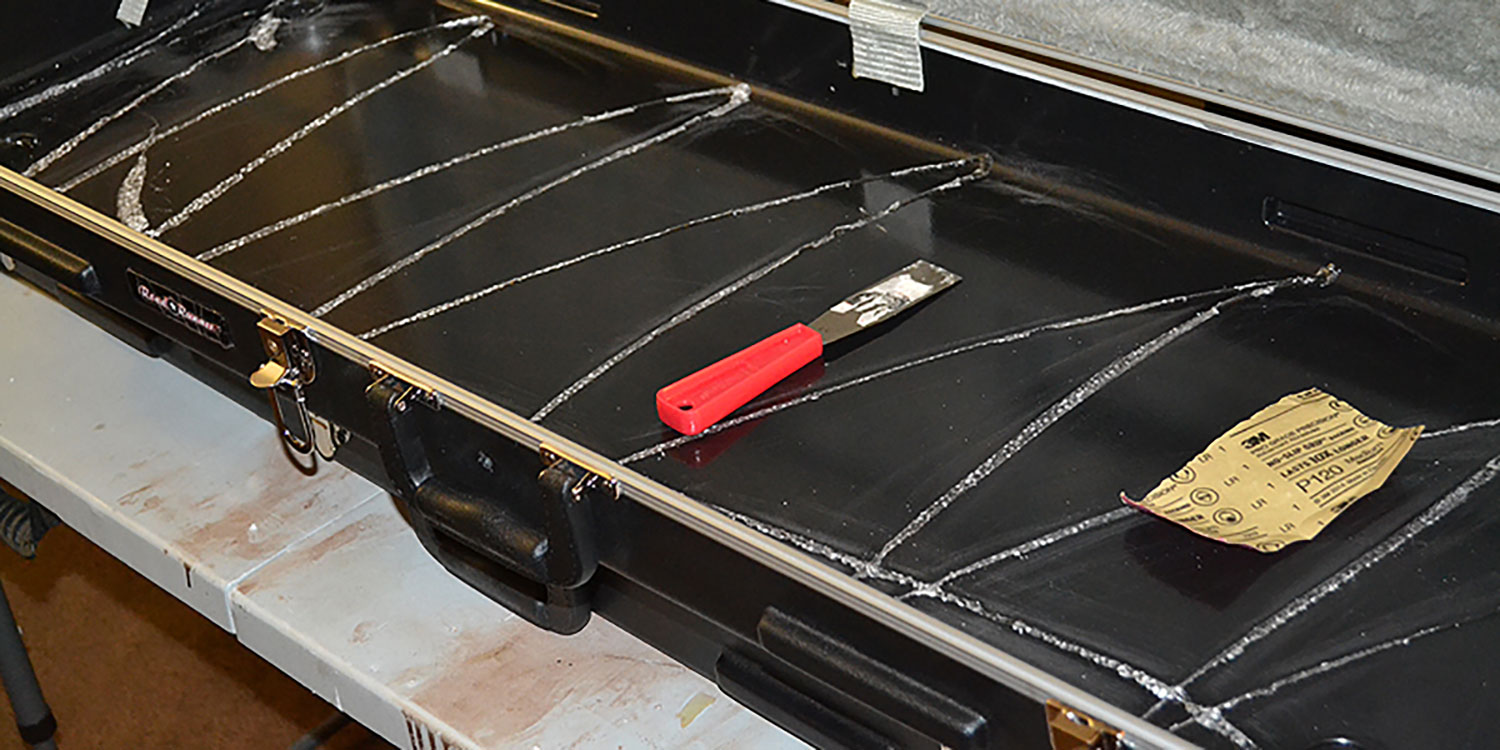
STEP ONE: Remove the guts of the case. This will take a good part of a day to do. Start by unscrewing or unbolting anything that may look like it is holding in the guts of the case. There is usually a screw on both sides near the handle. First tear off the fabric, exposing the styrofoam. The glue for most fabric is easy to pull off. I wish I could say the same for the glue that holds in the styrofoam, but I cannot. This glue is a nightmare, to say the least, and is of the type that stays tacky indefinately. You have to pick at the styrofoam, lifting pieces away from the glue. This is very time consuming. Use a putty knife to help lift up some areas. Be careful not to damage the plastic shell of the case, as it is is thinner than you may think. After you have removed the styrofoam pieces, you will need to sand down any glue that is too thick. When most cases are manufactured, the method for putting on the glue can be rather erratic. You may find glue that extends up to the sides. You do not need to remove the glue from the base part of the shell because it will be covered up. If there is any glue on the inner sides of the case, you may want to remove that as it may show.
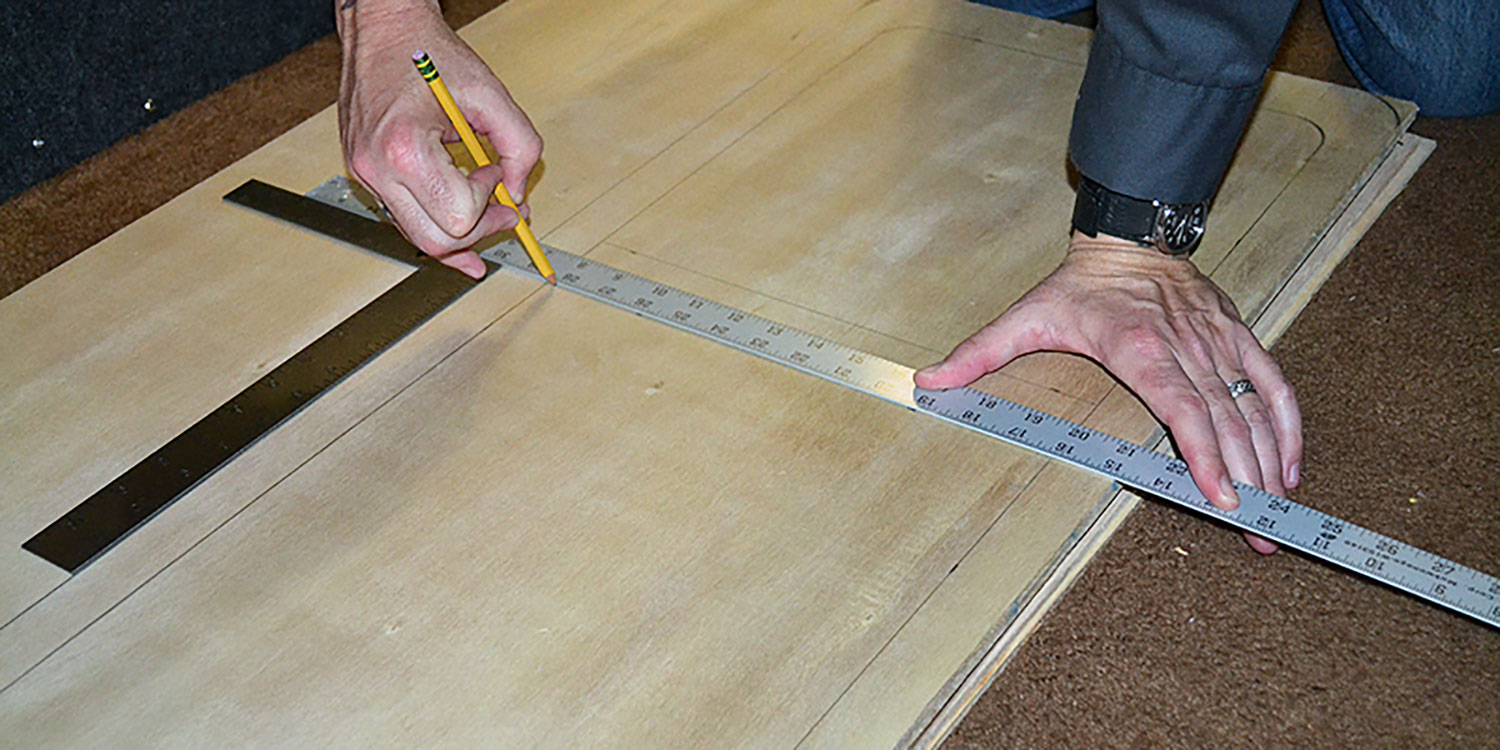
STEP TWO: After you have the case gutted to your liking, measure the inside bottom of the base and the lid. Use these measurements to purchase some sturdy, but light, finished plywood. To try and cut down on the weight, you need to make your base and lid pieces out of two laminated pieces. Start with a 1/2 inch plywood, cutting it to the measurements of the inside of the base of the case, and the inside of the lid of the case. The measurement should be about a 16th of an inch smaller, allowing for room of the upholstered fabric. Drop the pieces into the case and make sure they go into the shell easily. After you have these pieces, you need to stand them up and imagine where you will want your toys to hang.
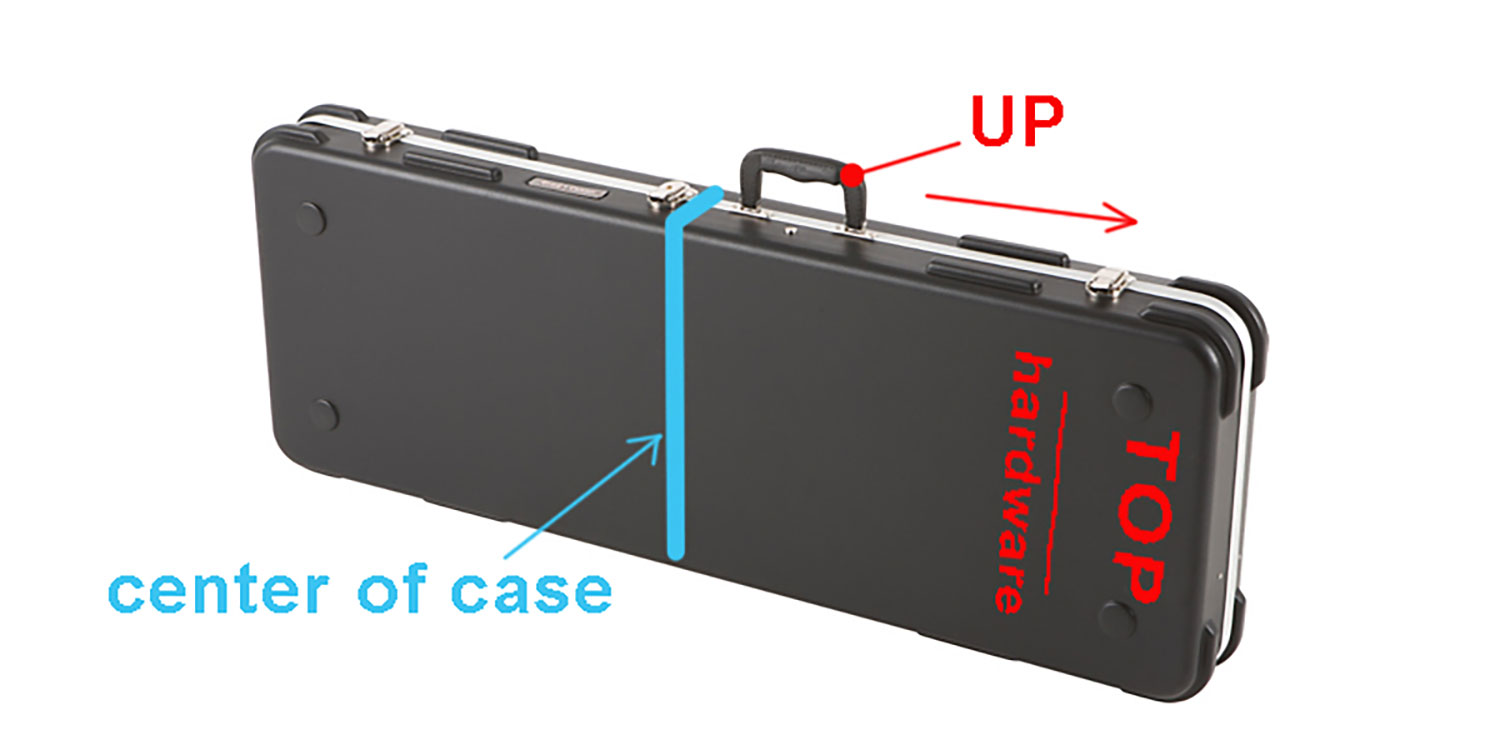
SPECIAL NOTE: The handle of the case is off center. When looking at the side of the case (case's profile), note that the handle is to one side. The side that it favors, must be the top.
STEP THREE: With a pencil, mark out all areas that will have the hardware (bolts to later be used as hooks), plus any areas you want to install straps. You can customize this to your toys. Make sure that you plan to offset any areas with straps or bolts from the base piece to the lid piece. You do not want any bolts from the lid to line up with bolts from the base when you close the case. If you are worried about placement, skip to step 8, putting the hardware on the plywood. Place your pieces in the case and make sure you are happy with the placement of the hardware. Then remove the hardware before moving on to
step 4.
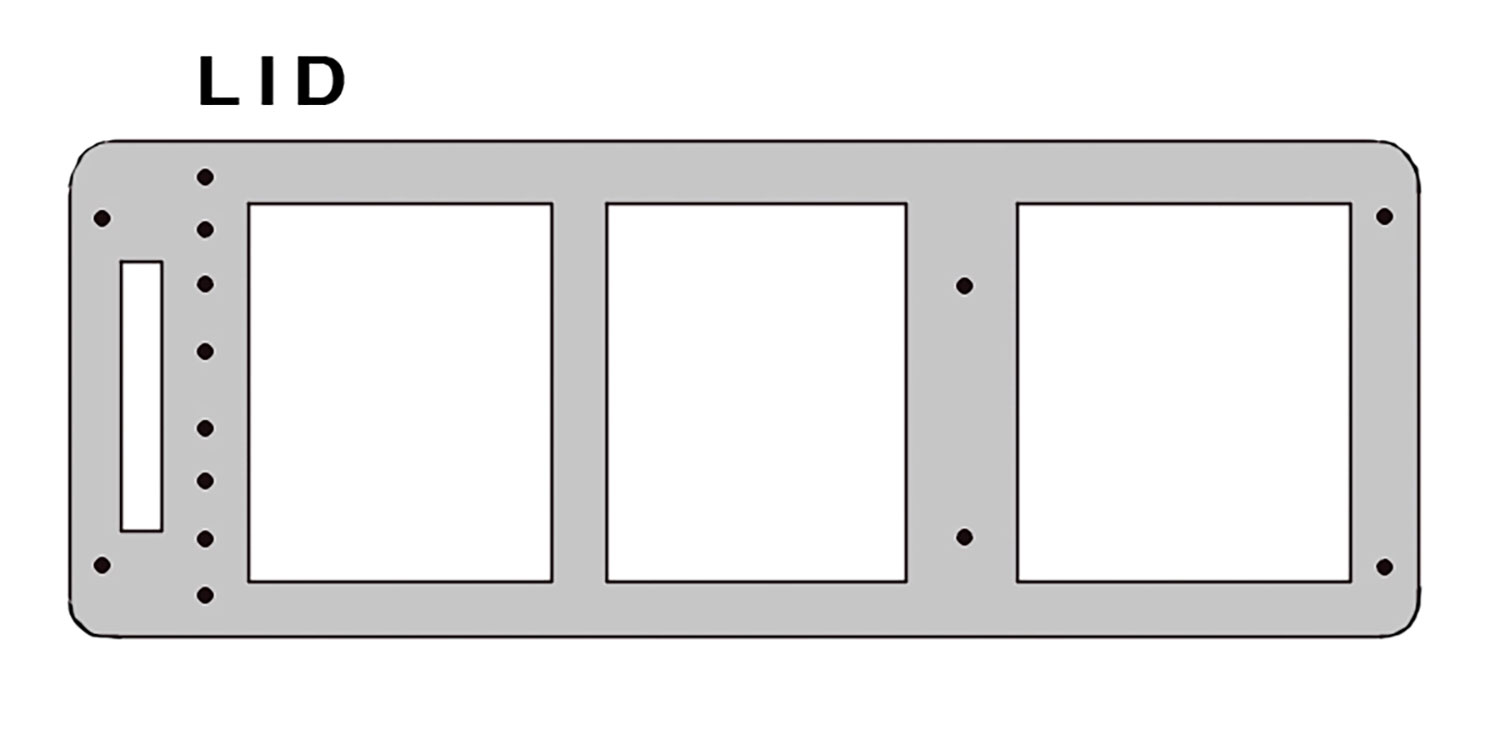
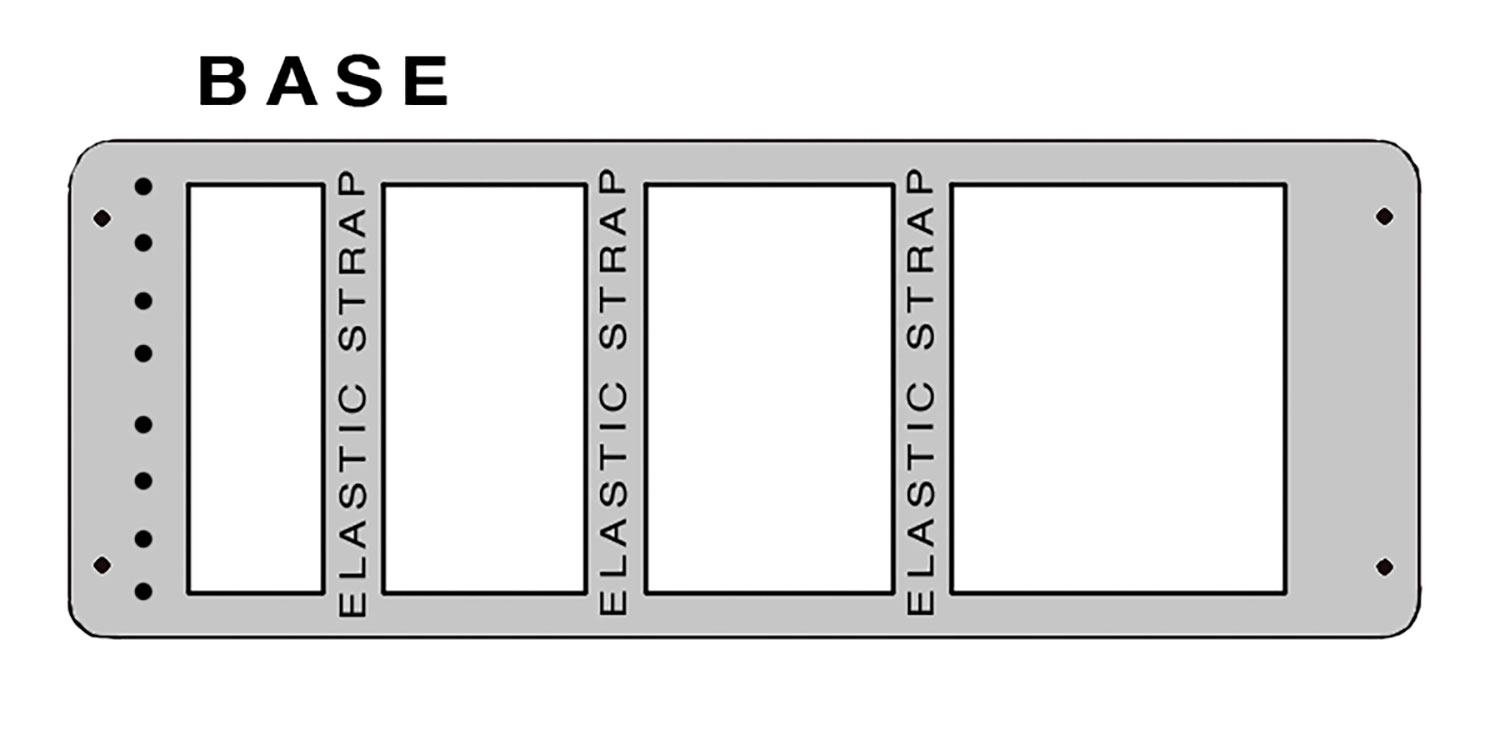
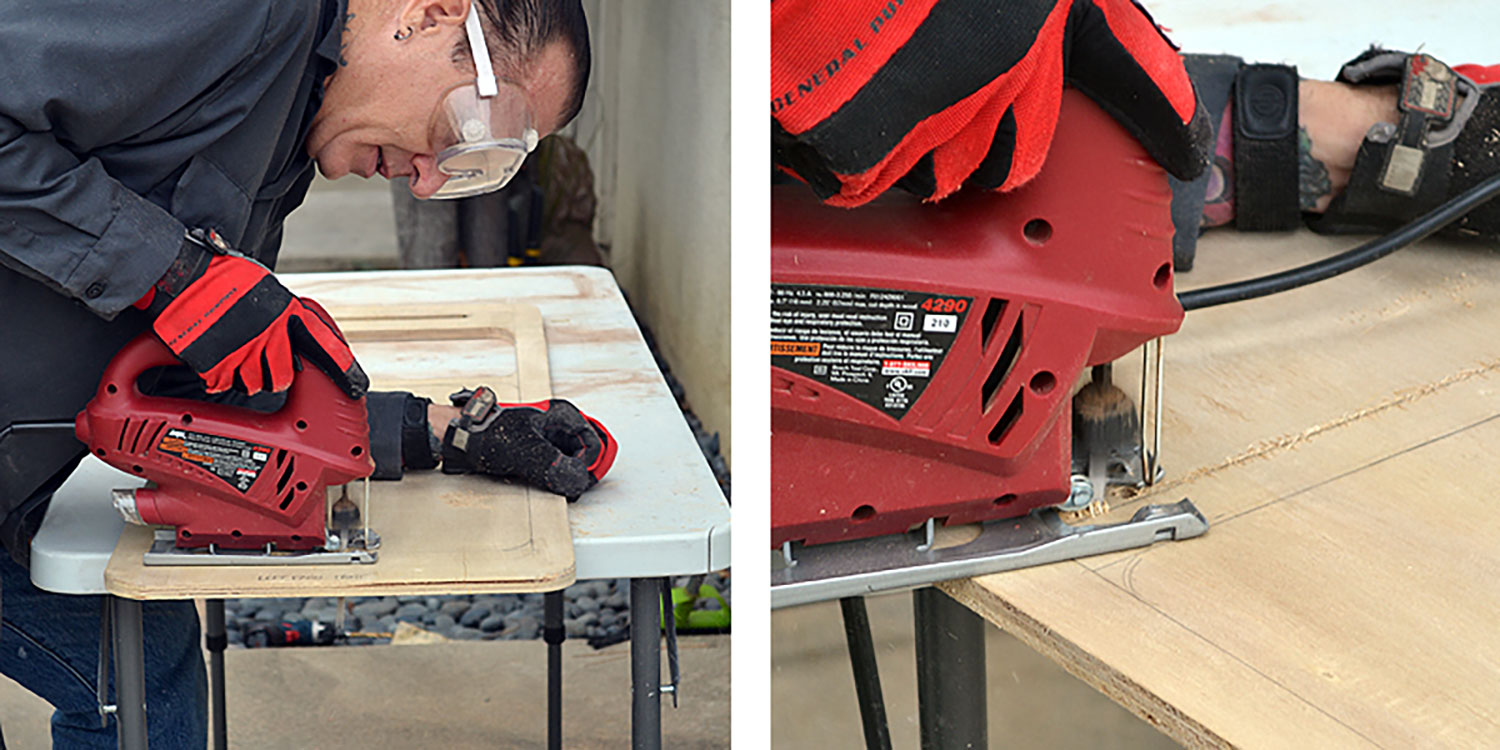
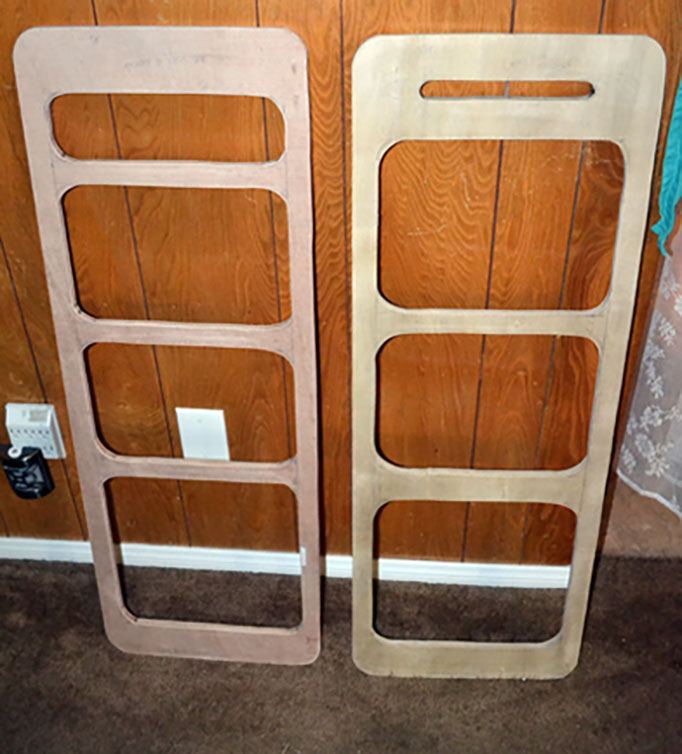
STEP FOUR: Mark off all areas that will not have hardware on them. Leaving about an inch or so border, cut away all areas that will not have hardware. You should be left with a strong, but light, frame for your base and lid pieces.
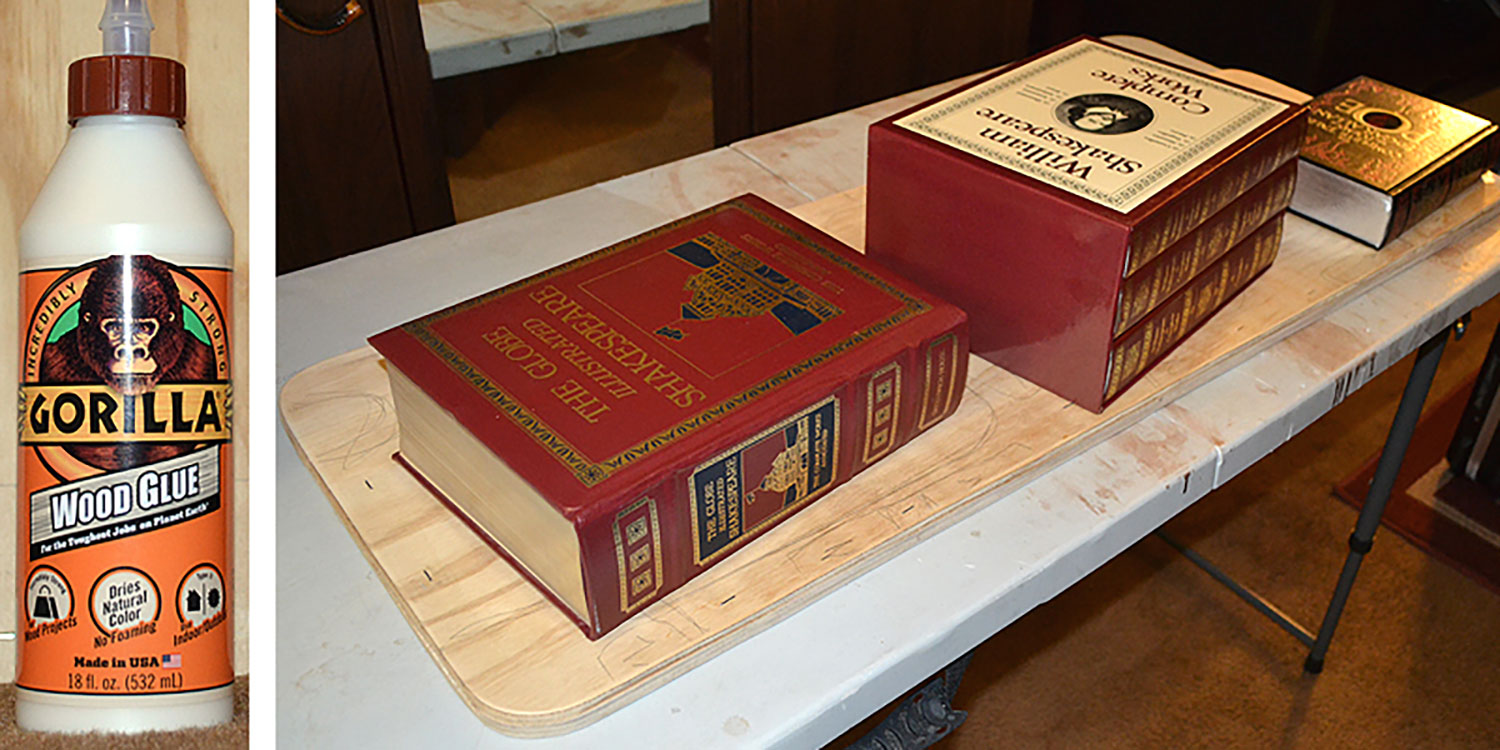
STEP SIX: Using a good wood glue, laminate the 1/2 inch frame plywood to the 1/4 inch solid plywood. Cover the entire surface with glue. Use T50 staples to hold them together for immediate handling. Place plenty of weight on the entire surface. Let dry overnight.
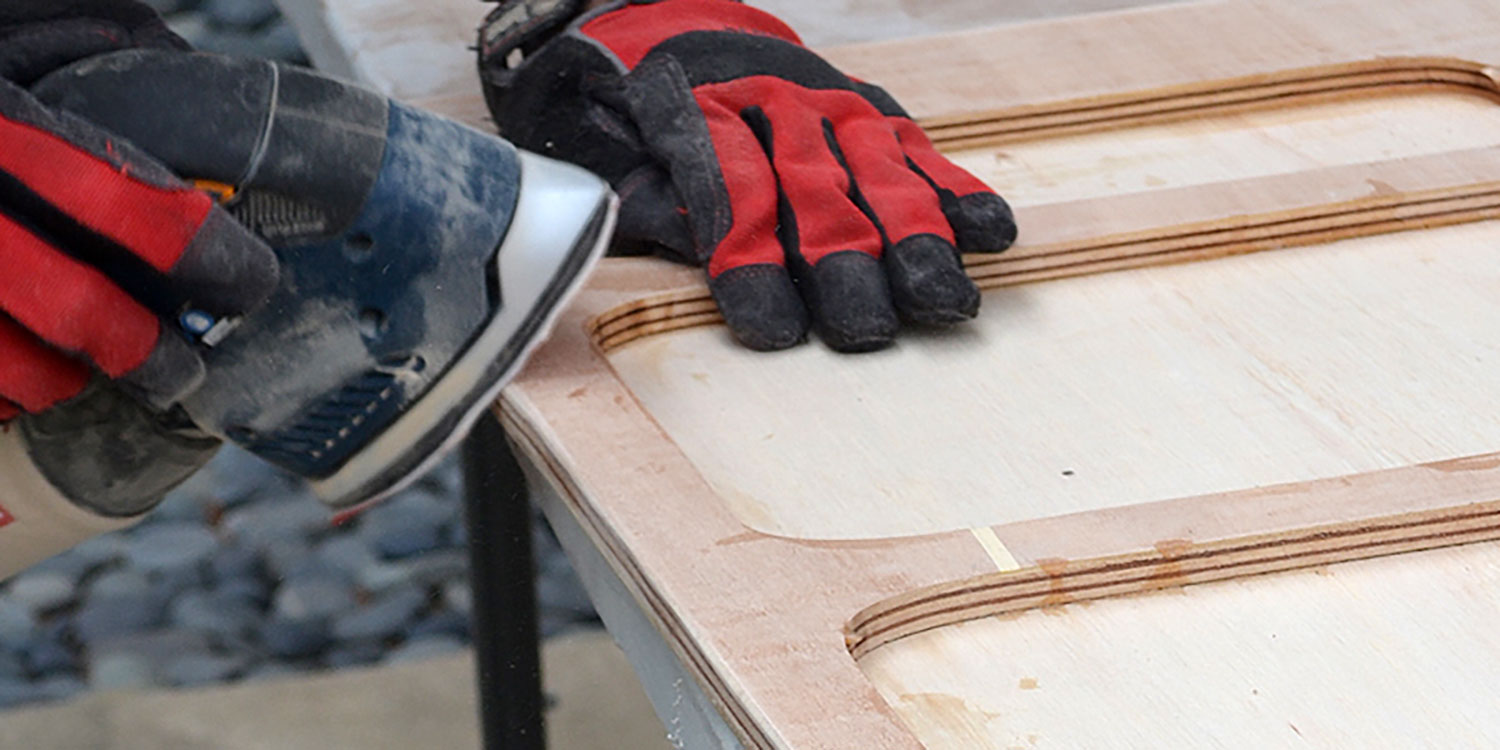
STEP SEVEN: Sand even any places that the plywood didn't match up perfectly. Then sand off any hard edges around the edge of the piece. The edge needs to be slightly bull nosed so that when you upholster, there are no hard edges that put strain on the fabric.
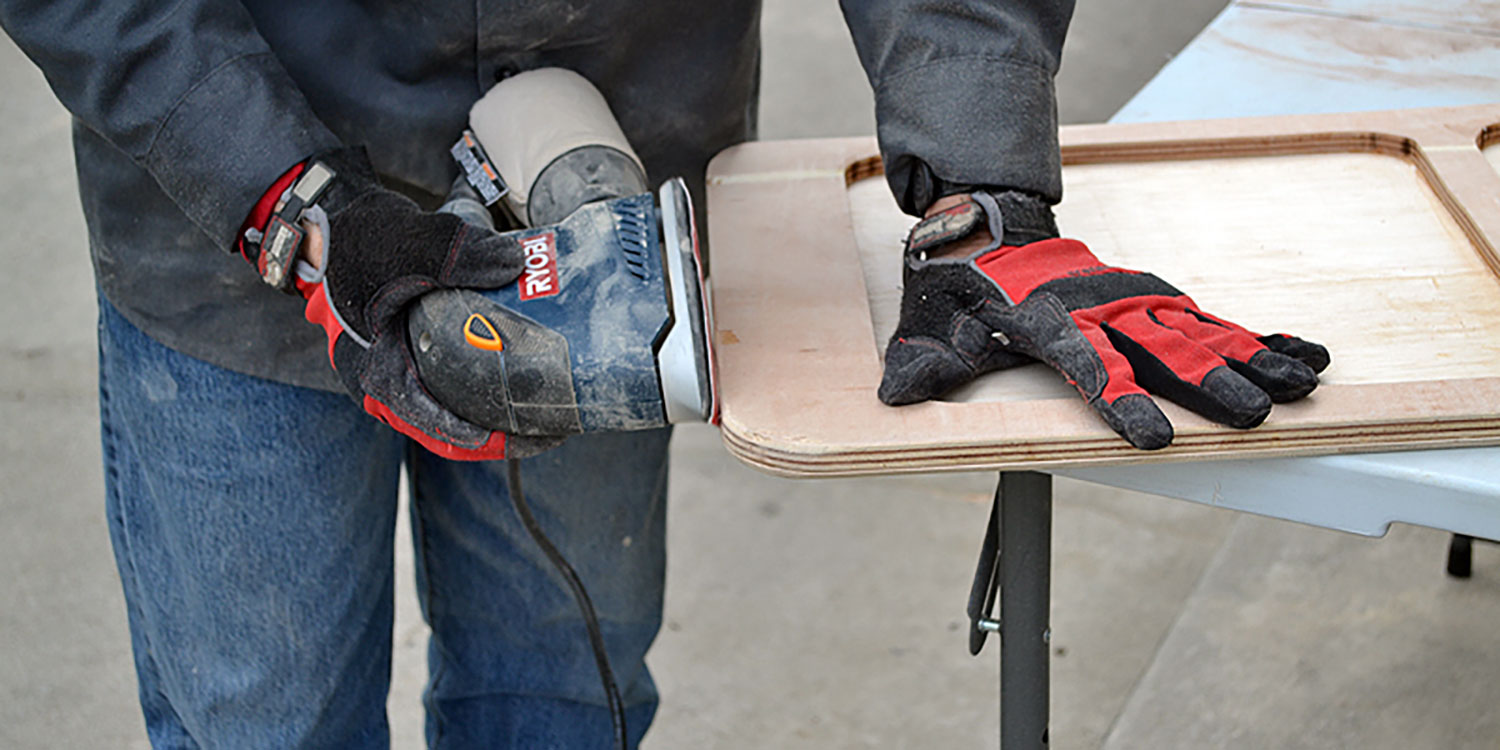
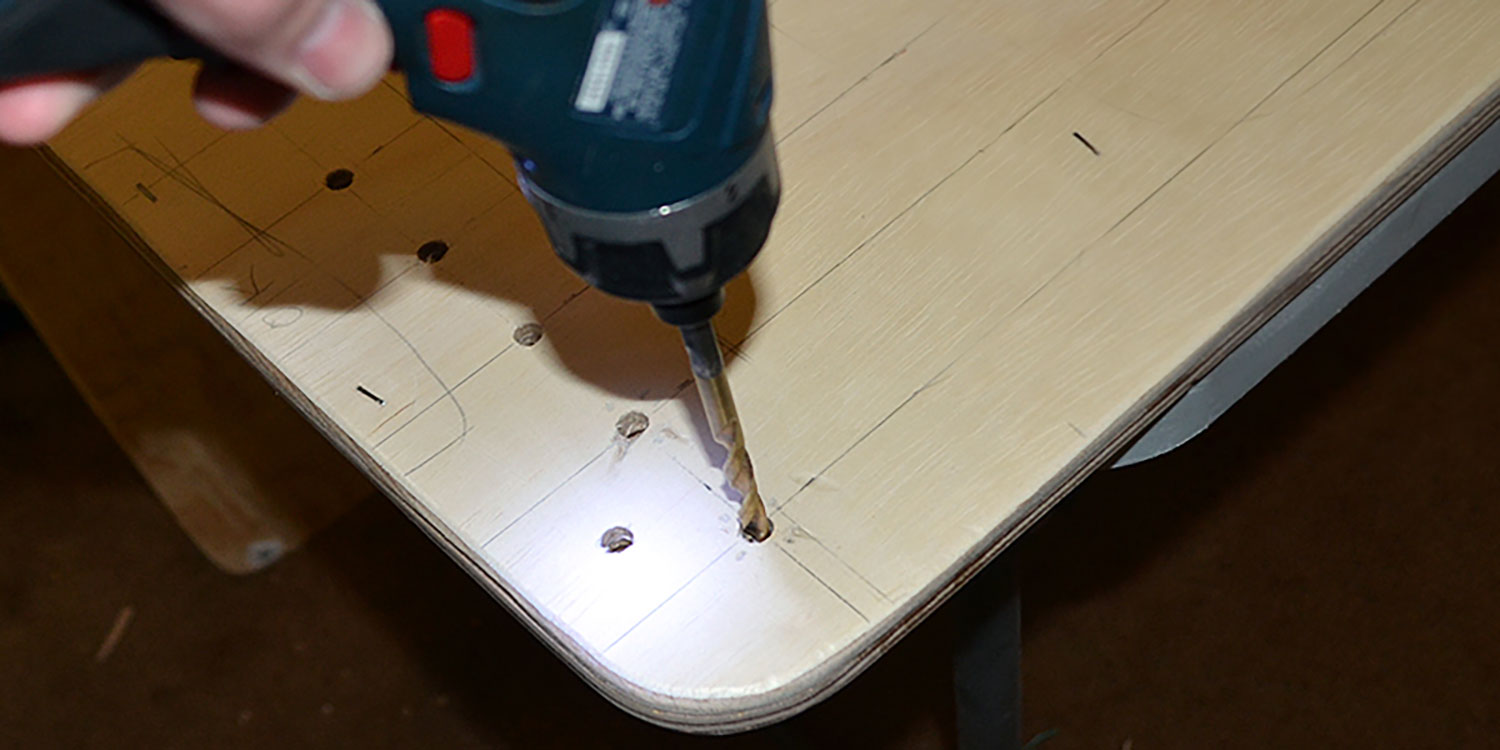
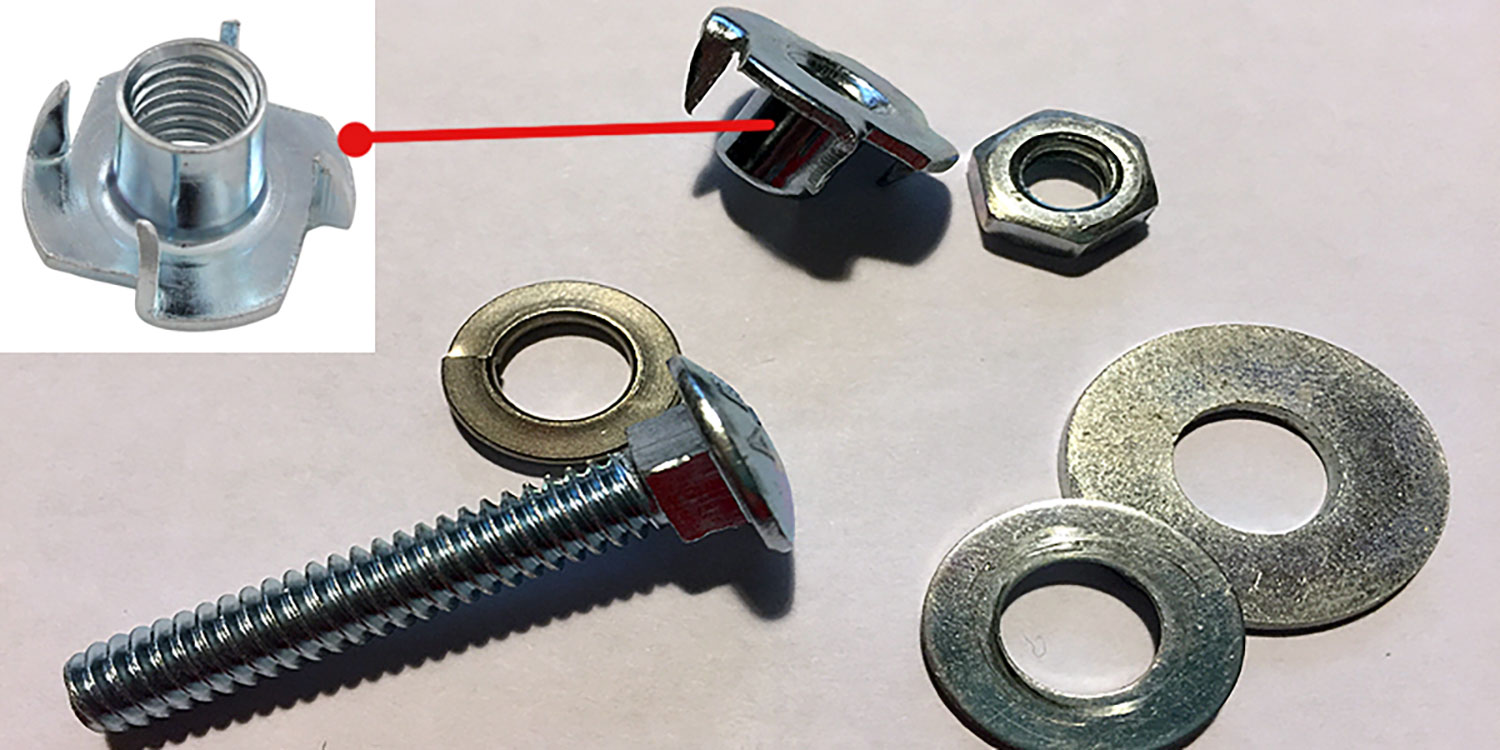
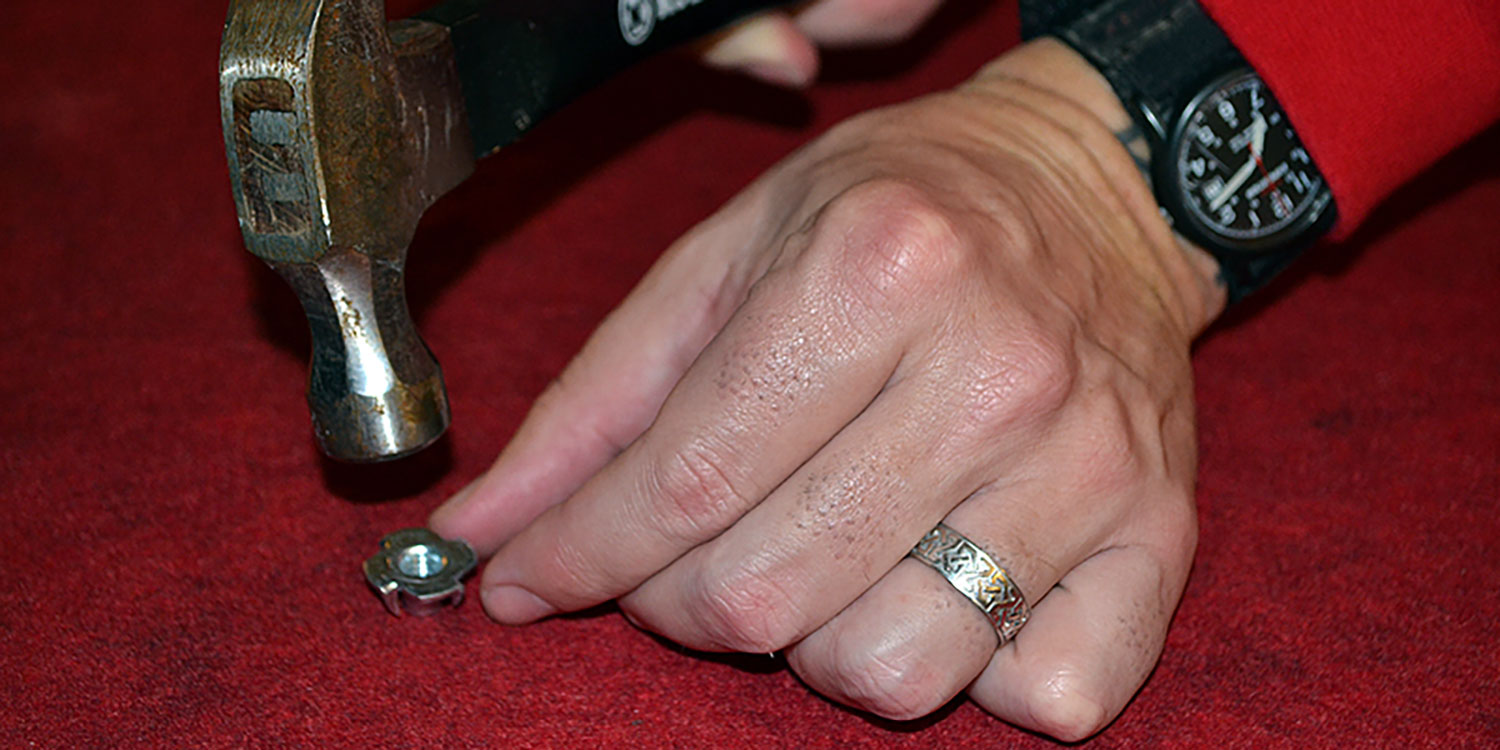
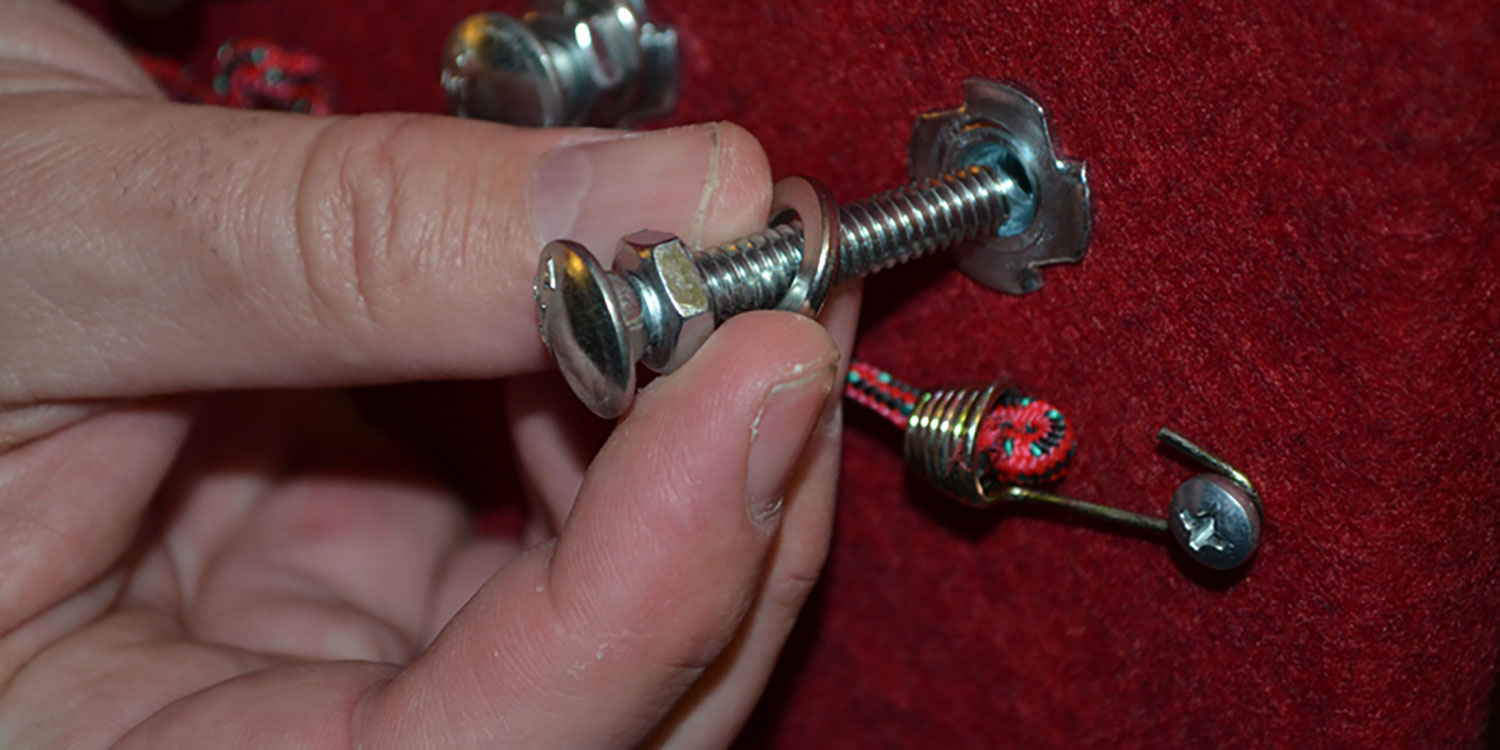
STEP EIGHT: Drill holes for your hardware. Put the hardware on, making sure that your holes are sufficient and free of splinters. The hardware (fasteners) that I have found works the best, are a combination of a carriage type bolt, t-nut, 2 hex nuts, 2 washers and a lock washer. You can choose any fastener configuration that works best for you. Be mindful of where you may want to put elastic straps, but do not install them yet. Be mindful of where you might want to put screws for small bungee cords, but do not put those screws in yet. Now take all the hardware off the plywood.
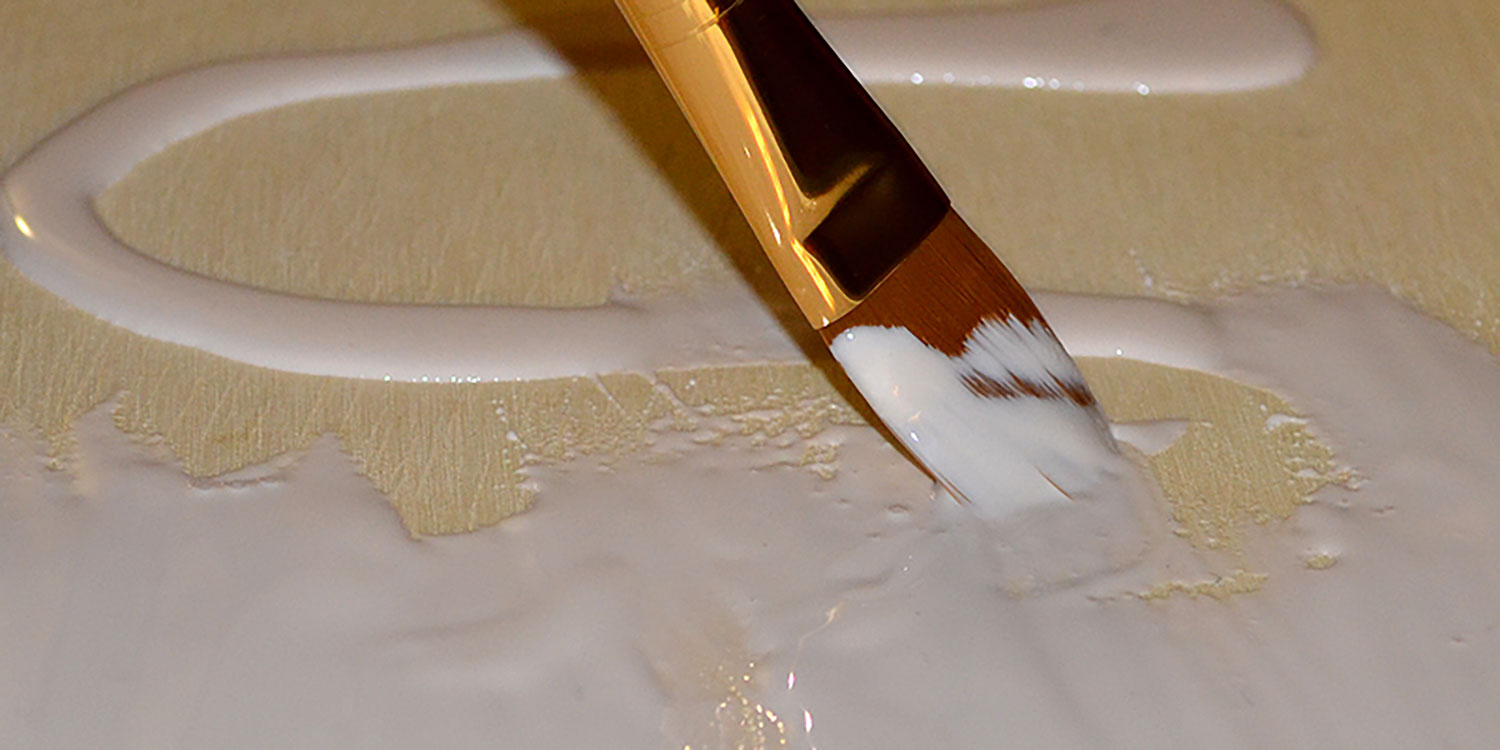
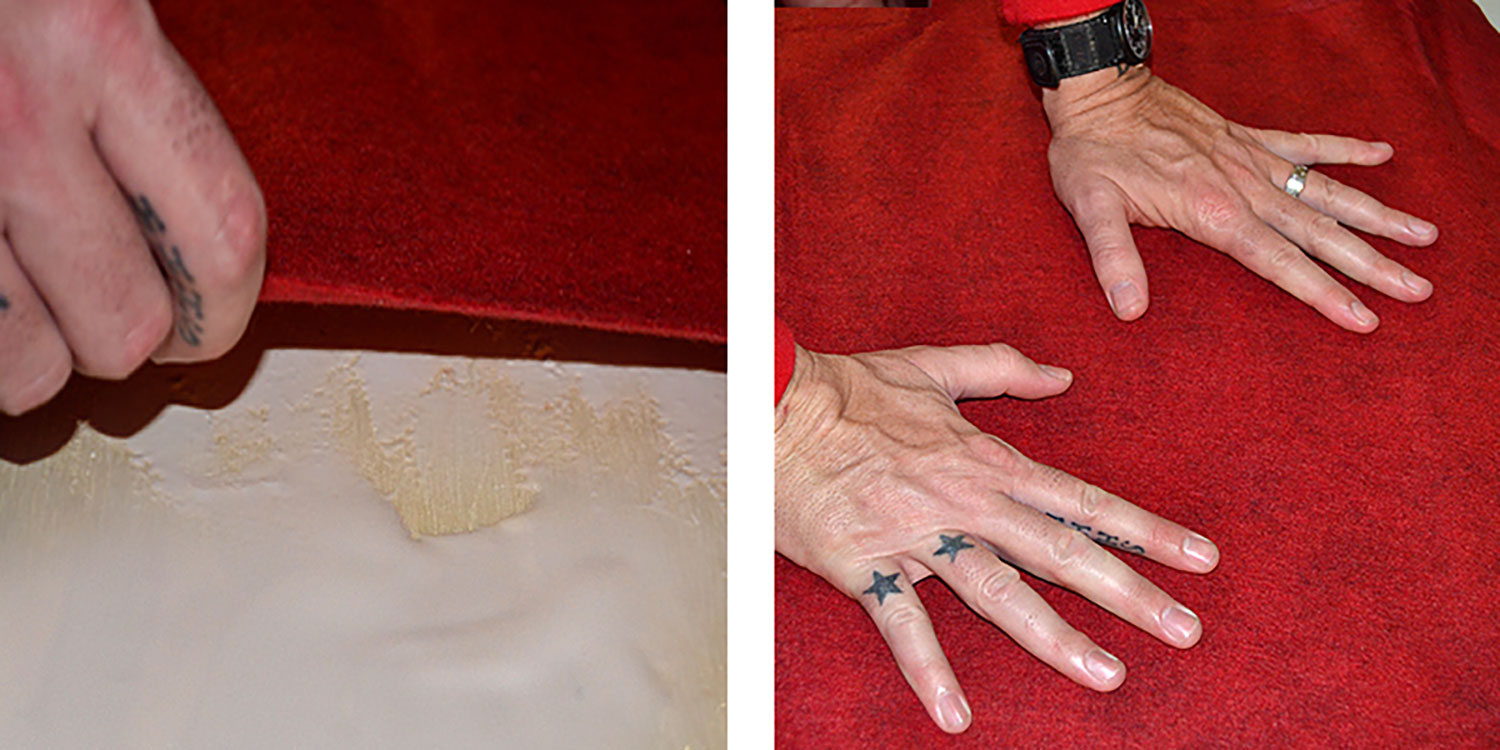
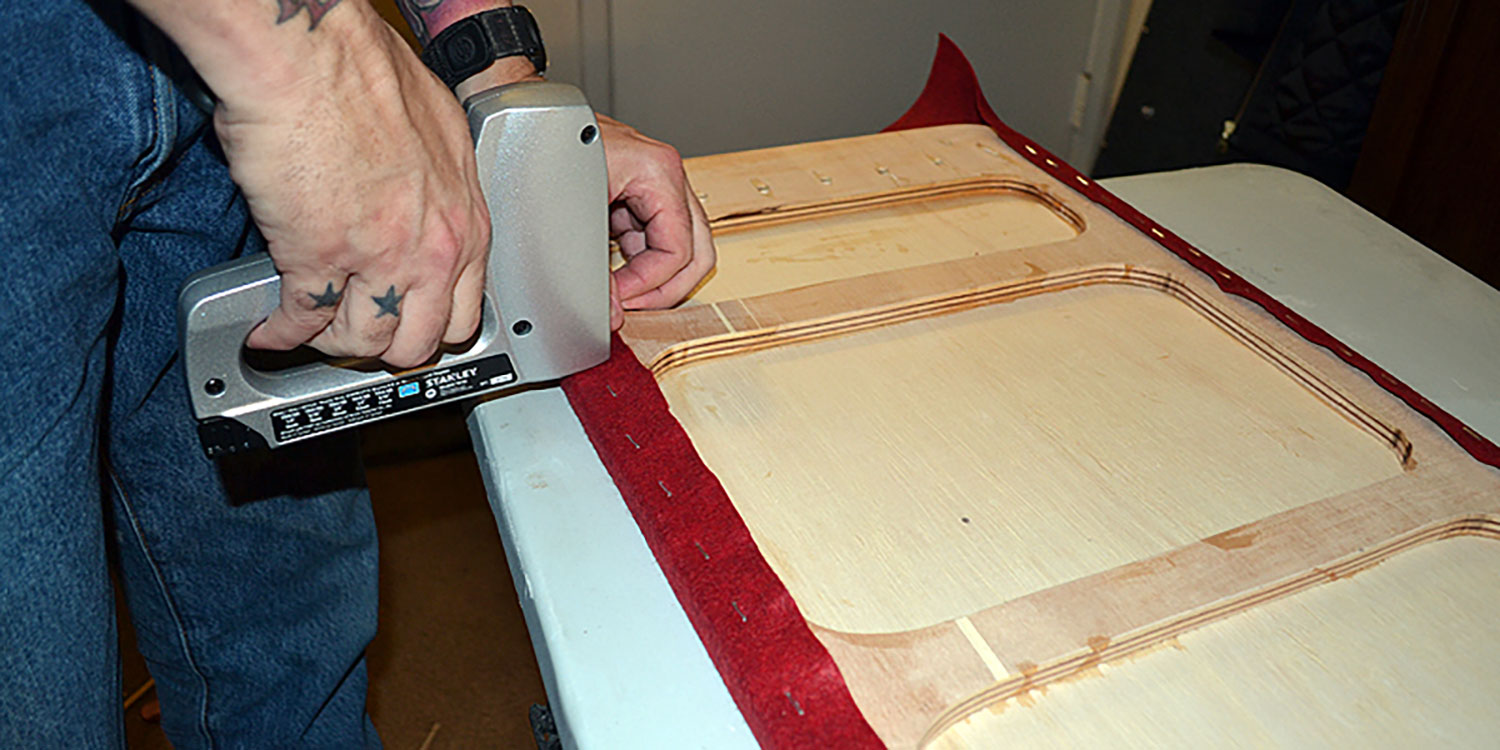
STEP NINE: Upholster the piece with a strong felt. You can find industrial felt fabrics at most fabric stores. They come in several different colors. Cover the top solid piece surfaces with a good wood glue. Use a brush to spread the glue out evenly. Cover the piece with your fabric making sure there is plenty of fabric beyond your target area (fabric must be larger than the plywood piece). Smooth out the fabric with your hand, making sure there are no wrinkles or creases. Place a few temporary T50 staples on the outer edge to hold the fabric while you flip it over. Carefully flip over the plywood so that it is facedown on the fabric. Pulling on the fabric slightly, stretching it, T50 staple fabric to the back side frame part. Use a hammer to make sure staples go all the way in. Remove the temporary staples along the edge, or use a hammer to make sure that they do no obstruct fitting into the shell of the case. Cut away any excess fabric on the back. Let the glue dry overnight.
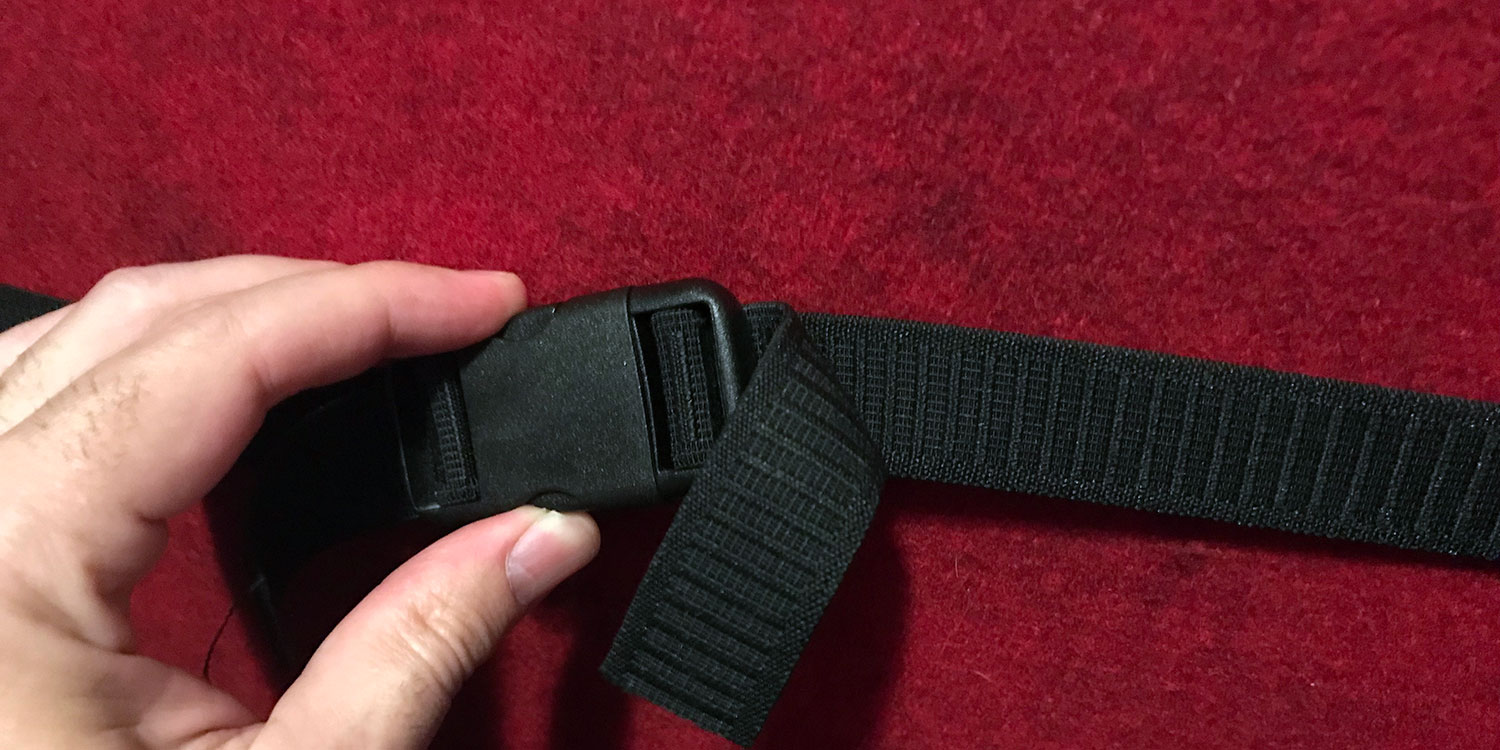
STEP TEN: Carefully take an X-Acto blade and cut the fabric where your holes are for the hardware. It is safer to use the drill, going through the back side. If you use the drill, let the drill bit do the work, making sure not to push or put pressure on the fabric. Now put on your hardware. Bolt the fasteners in. If you are using elastic straps with buckles, (found at most fabric stores), glue and staple them to the back of the piece, allowing the straps to wrap free around to the front. Put screws on the border for where you want your small bungee cords.
STEP ELEVEN: Place the finished base piece and your finished lid piece into the case. On each finished piece, drill two holes at the top and two holes at the bottom, going through the plastic shell of the case, at the top and the bottom (four holes total in each piece). Bolt the pieces in.
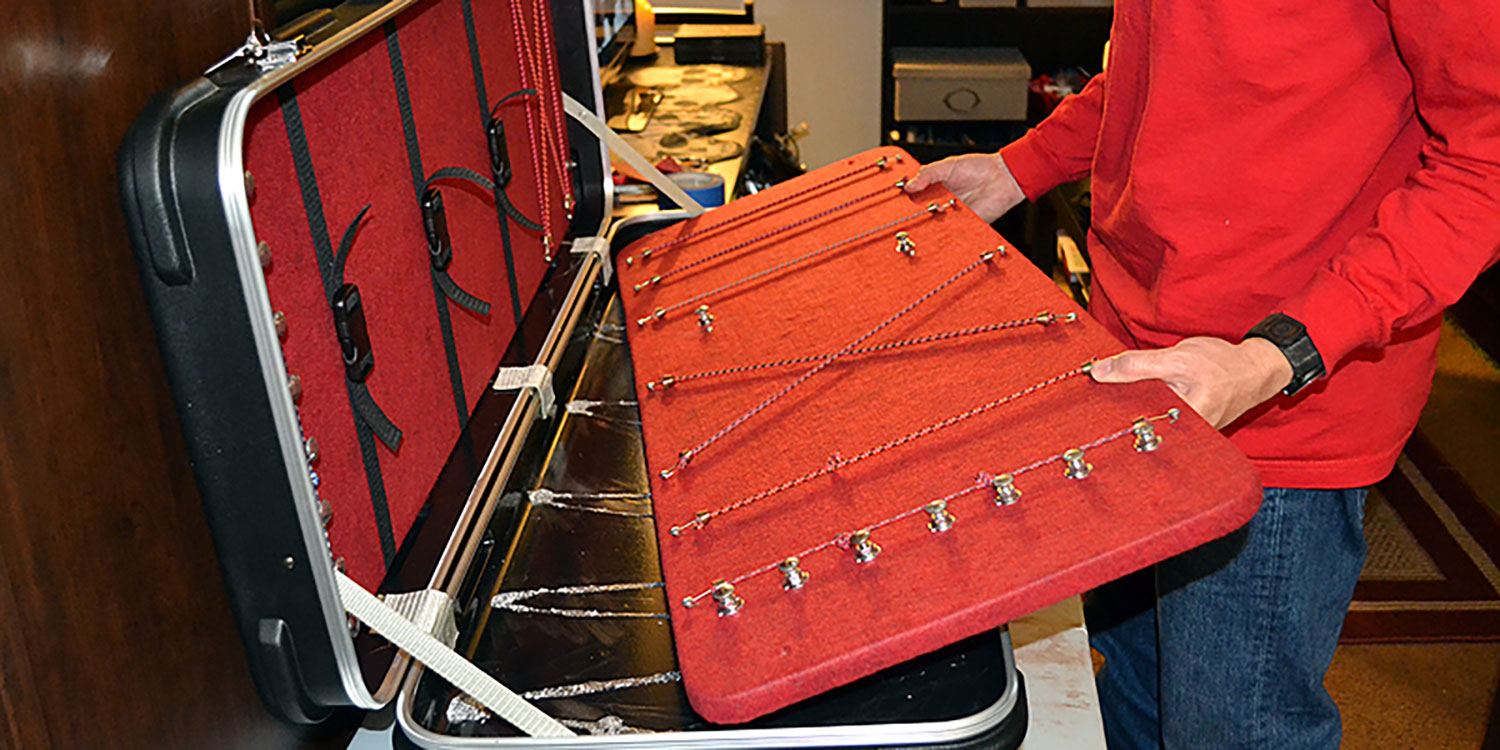
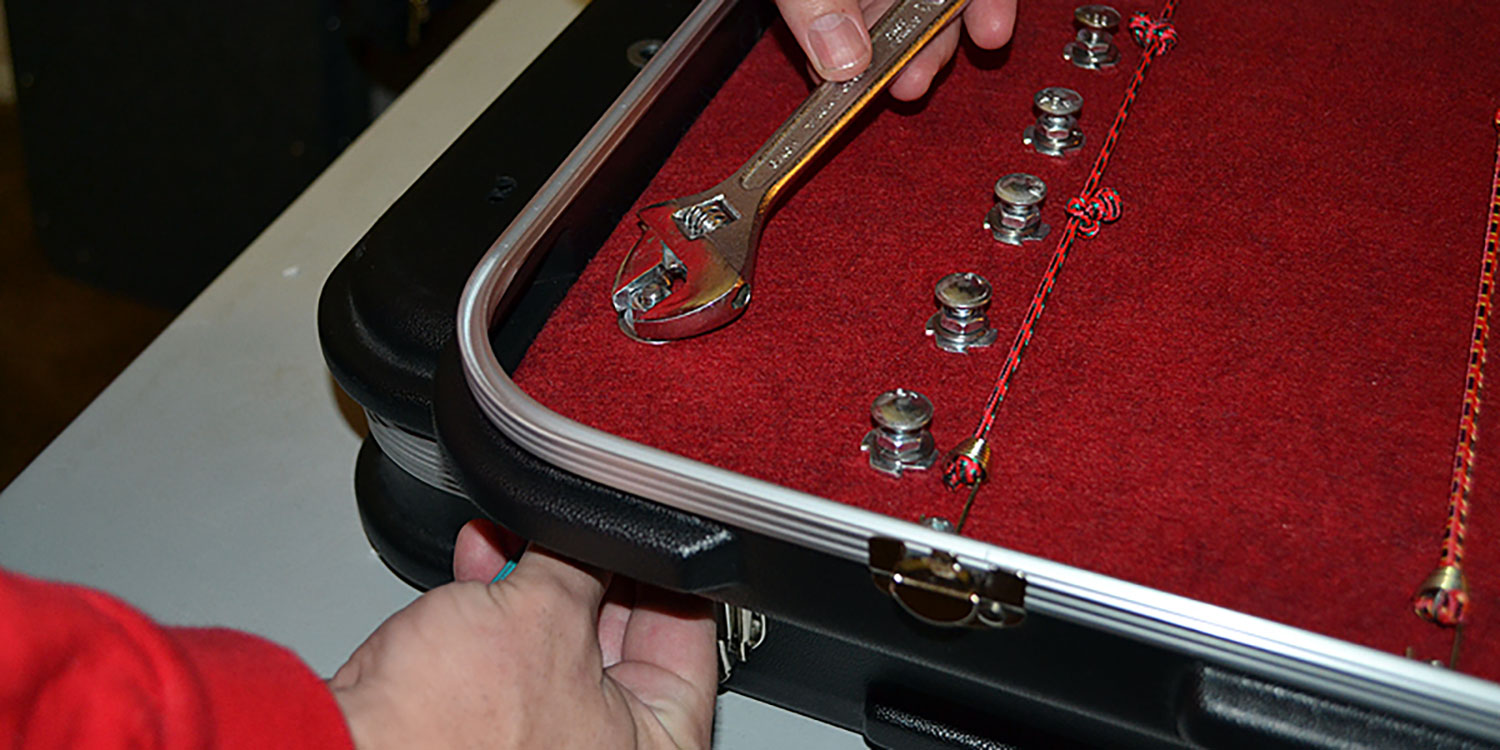
Make sure the case closes correctly. Load and go play.


~